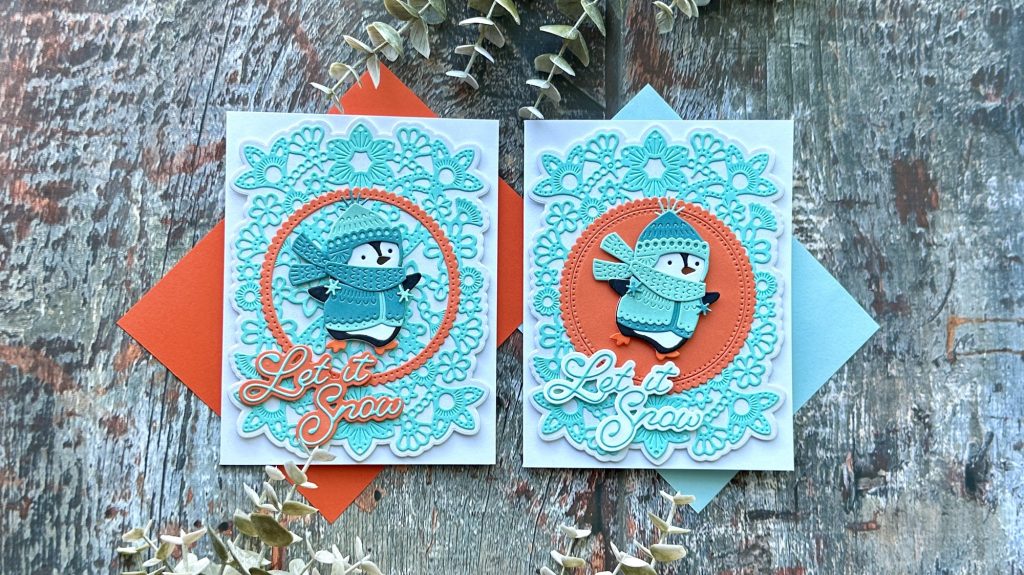
Creating cards with depth and dimension is one of my favorite techniques, and today, I’m sharing two cards featuring a sweet penguin and some beautiful Nordic-inspired designs from Poppystamps. Let’s dive into the details of how I made these cards stand out!
Building the Adorable Penguin Focal Point
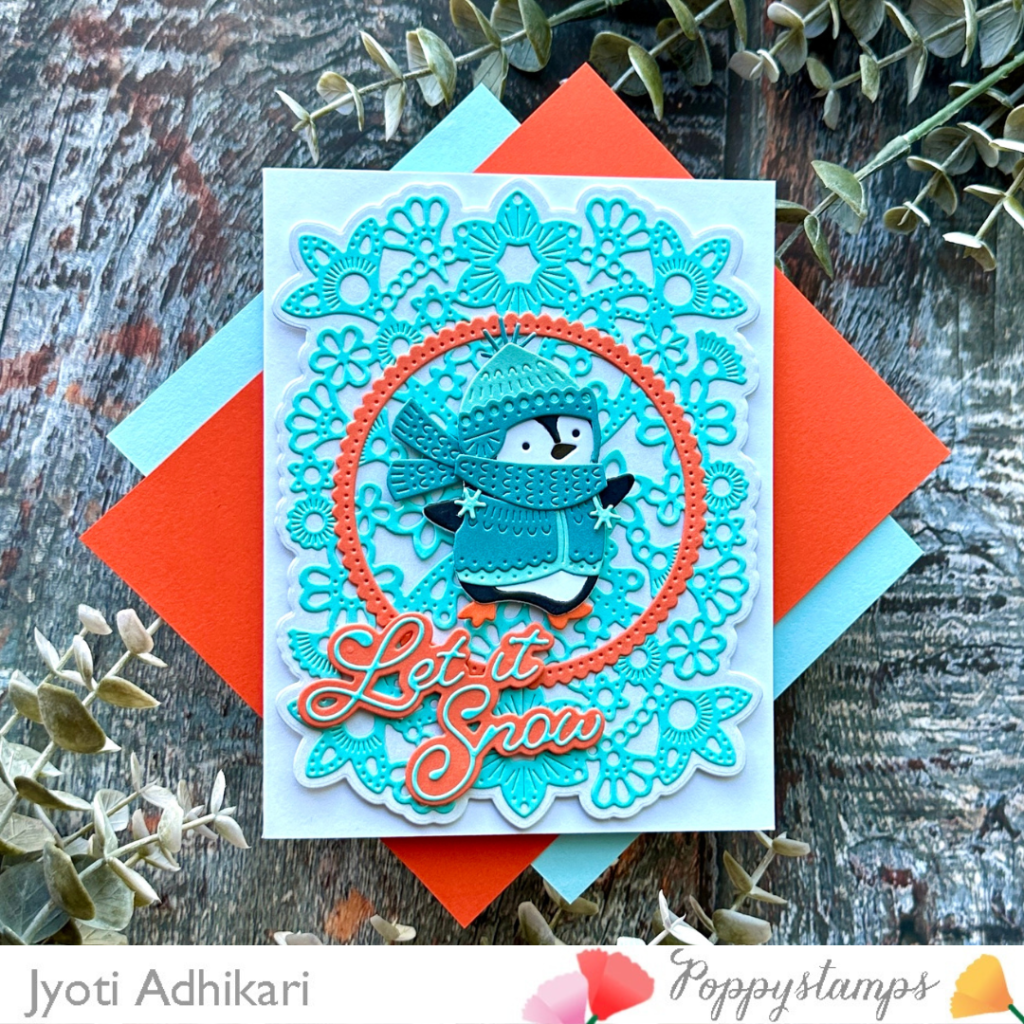
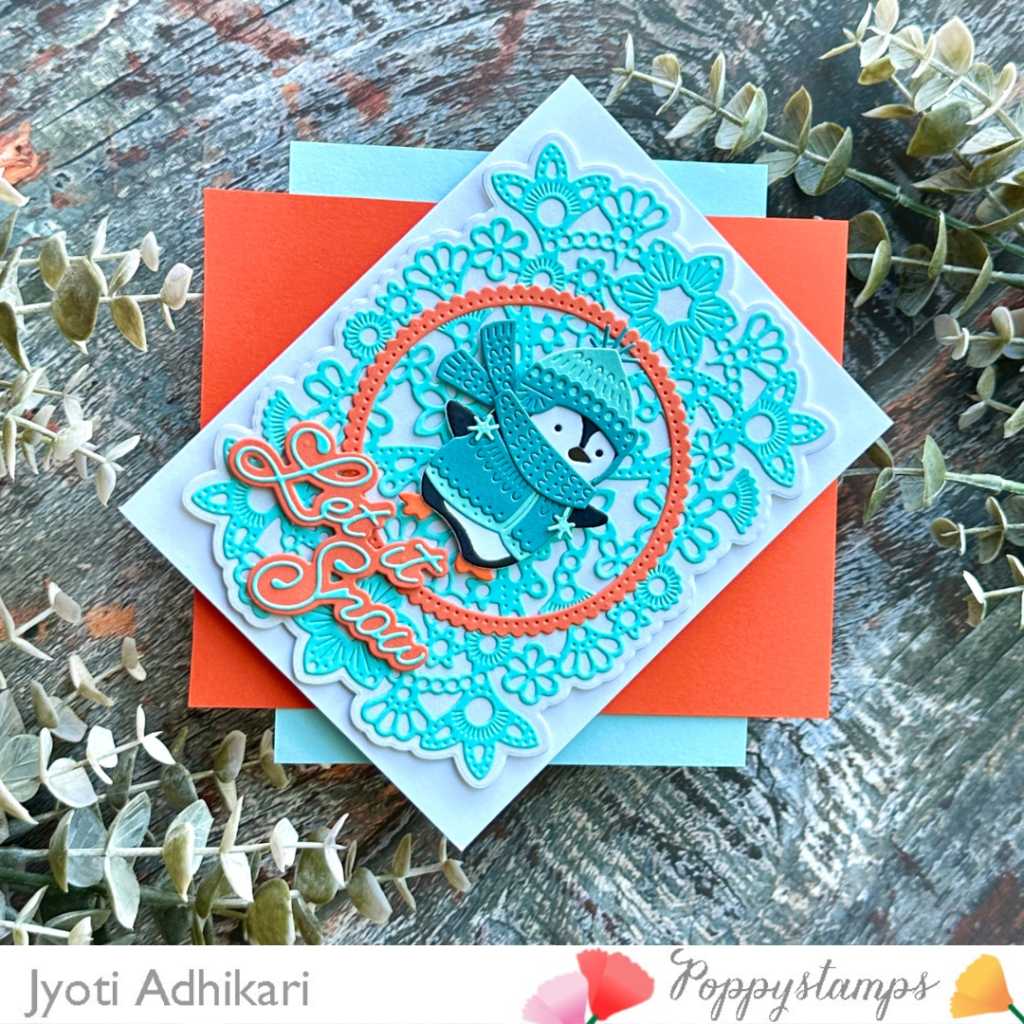
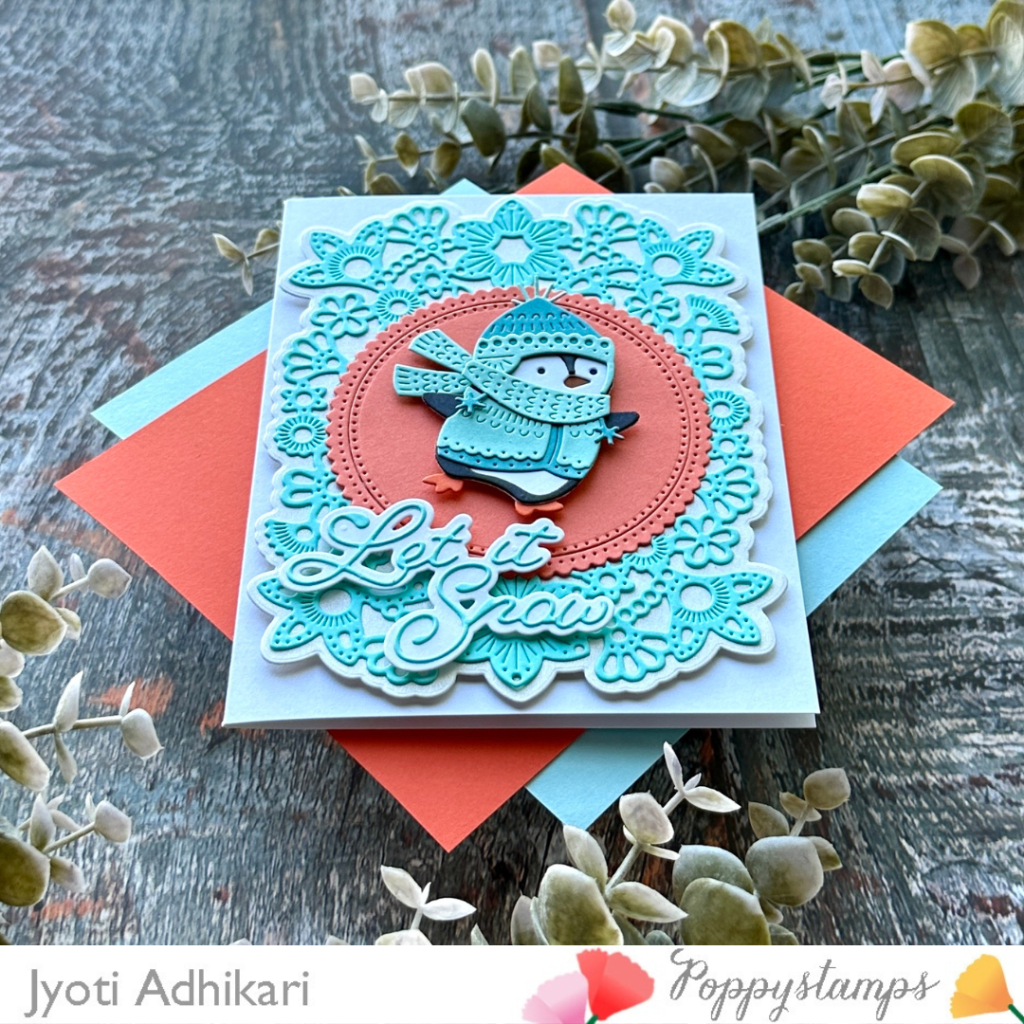
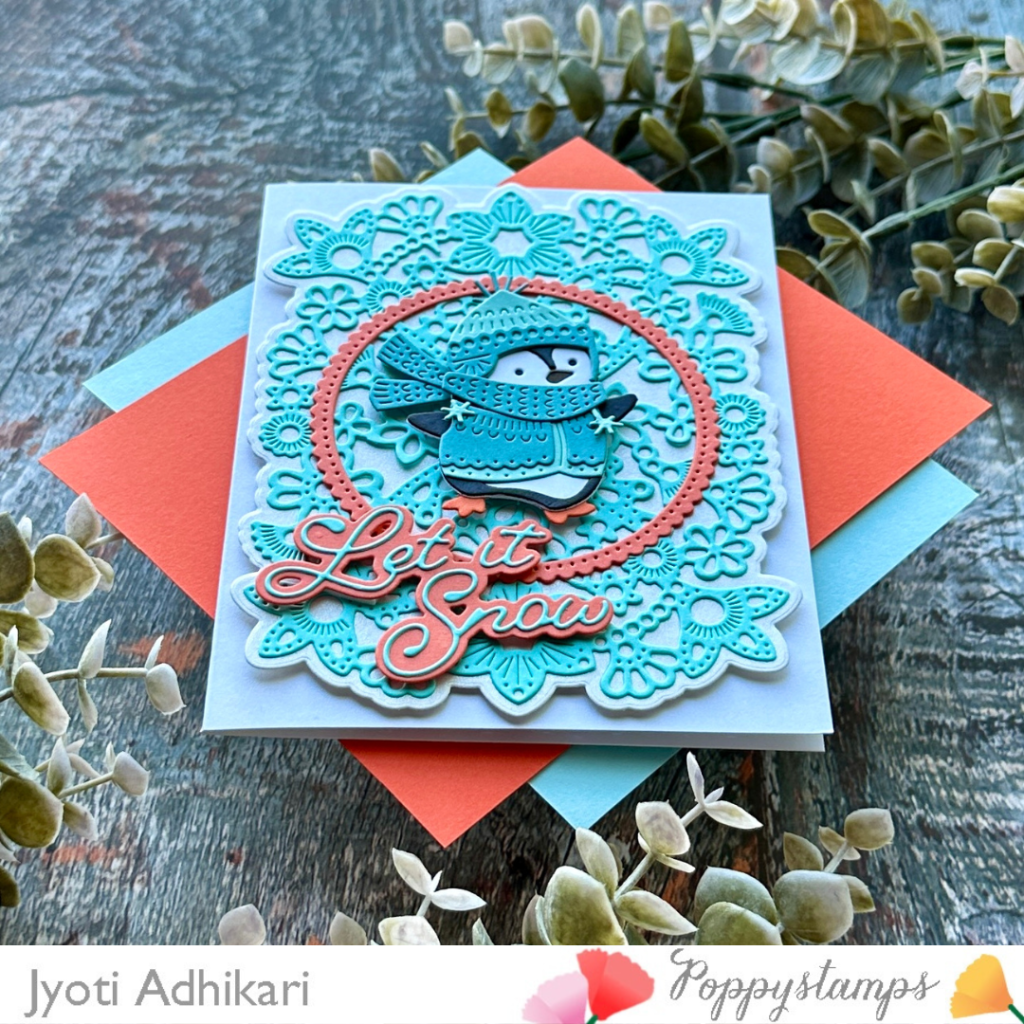
For both cards, I chose the Nordic Playful Penguin Craft Die as my main focal point. I dressed my penguin in a cozy teal coat, scarf, and hat. The detail in this die is just charming, and the winter attire adds a cute, playful element to the card. I used foam tape to add dimension, making the penguin pop off the background.

Creating a Delicate Background
The background was made with the Nordic Fancy Background Craft Die, which is a two-piece set. I cut the solid background layer from shimmery white cardstock and the top, intricate floral layer from teal cardstock. This combination created a subtle but beautiful contrast that perfectly complements the penguin. The delicate design of the floral layer added an elegant texture, while the shimmer of the base layer gave the card a wintery sparkle.

Adding a Contrast with Circles
To help the penguin stand out even more against the detailed background, I used the Scallop Pinpoint Rings Craft Die to cut an orange circle. The warm orange color really popped against the cooler teal and white tones of the card, providing the perfect contrast for the penguin to take center stage.
Crafting the Perfect Sentiment
The sentiment “Let it Snow” was created using the Let it Snow Moonlight Script Craft Die. I die-cut the letters in teal and used shimmery white cardstock for the shadow layer. This added another cohesive pop of color that tied the card together beautifully. The sentiment was placed at the bottom of the card, aligning perfectly with the overall design.
Assembling the Card
With all the elements ready, it was time to assemble! I adhered the background to an A2 card base with foam tape for that added lift. The orange circle was glued to the center, providing a vibrant base for the penguin. Finally, I attached the penguin with foam tape for even more dimension. The sentiment was carefully placed along the bottom, completing the first card.
Alternate Design: A Twist on Color and Layout
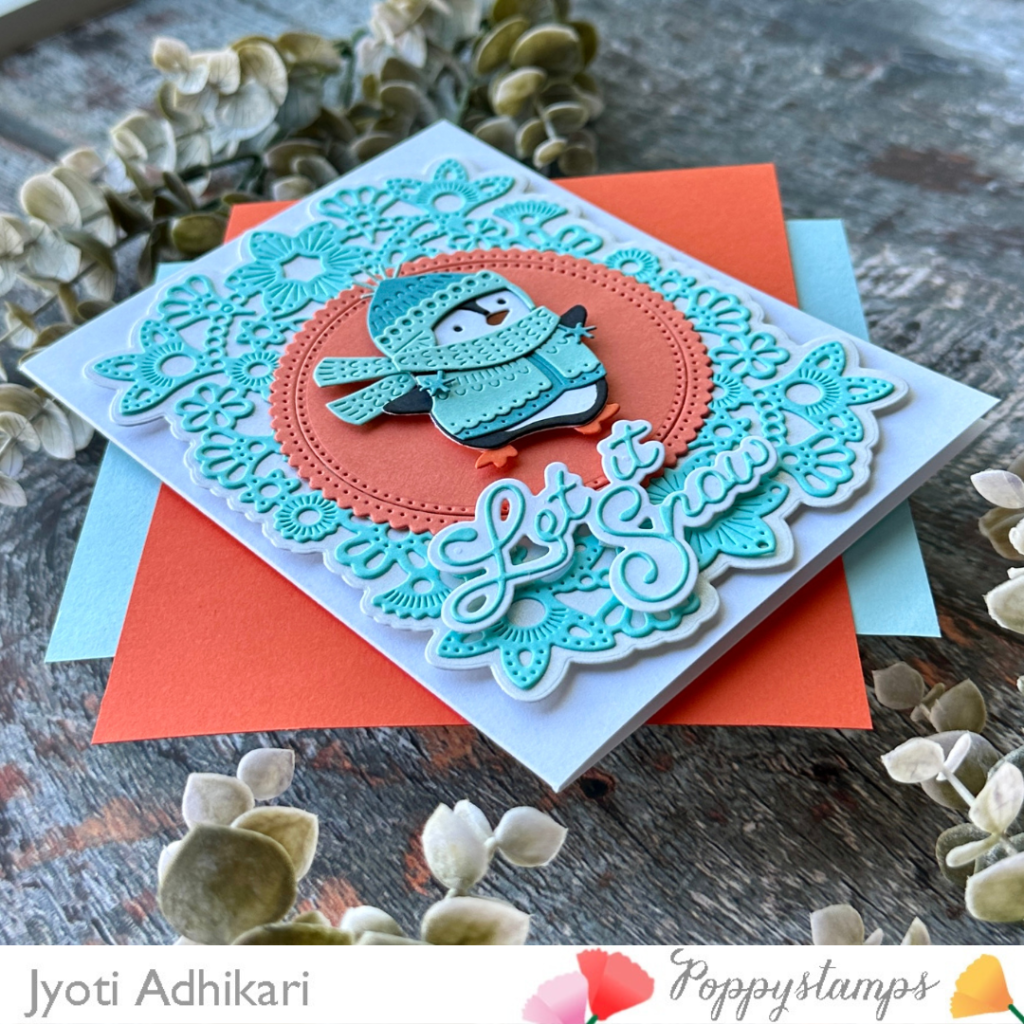
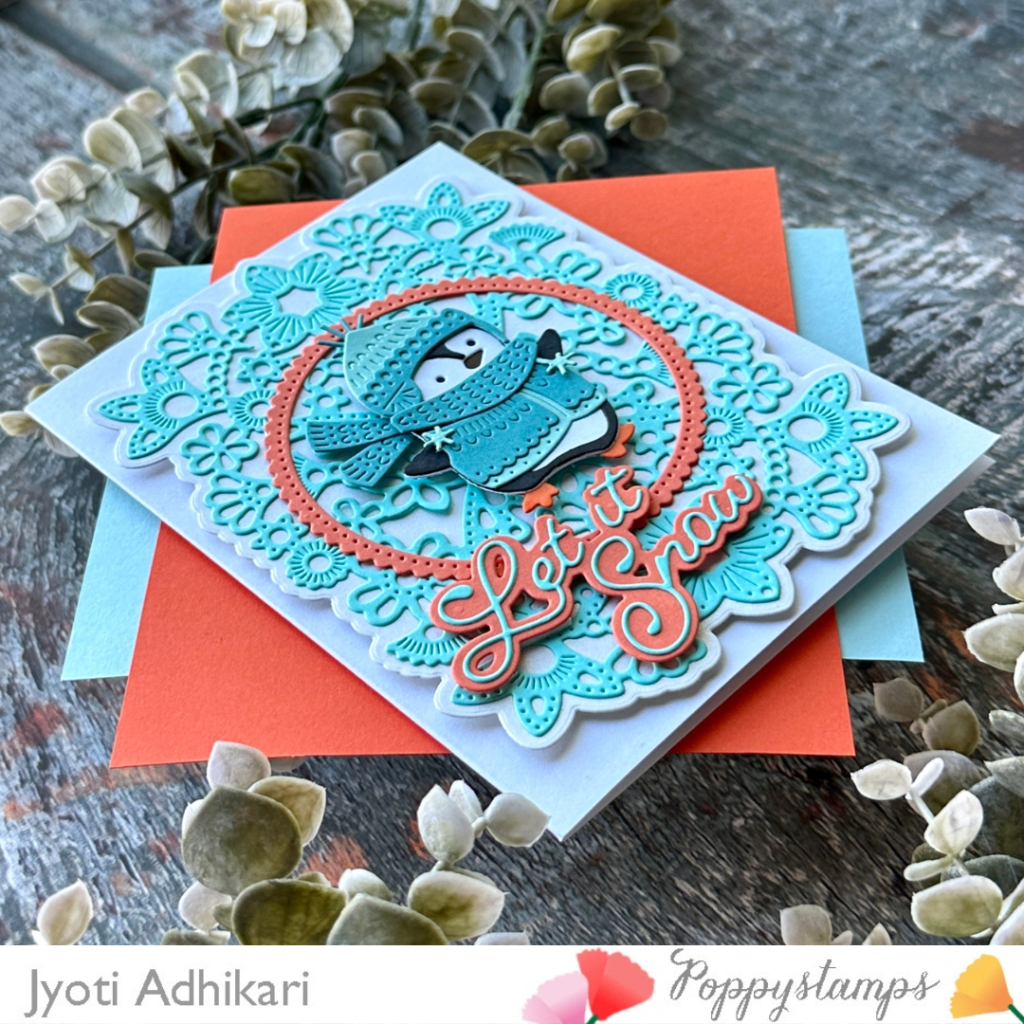
For the second card, I decided to mix things up a little! Instead of the full orange circle, I used just the outer ring from the Scallop Pinpoint Rings Die for a more open look. I also changed the penguin’s outfit colors for a fresh twist. This time, I used teal cardstock for the sentiment’s shadow layer and orange for the letters, reversing the color scheme for a bolder look.
Final Thoughts
These dimensional cards featuring the playful penguin were such fun to create! The combination of layers, foam tape, and carefully chosen colors gave the cards a unique, handcrafted feel that stands apart from flat, store-bought designs. Whether using bold colors or playing with different layout elements, each card has its own personality while maintaining a cohesive style.
Hugs,

Nordic Playful Penguin Shop at: PS | SSS | ”
“Let It Snow Moonlight Script Shop at: PS | SSS | ”
Scallop Pinpoint Rings Shop at: PS | SSS | ”
“Nordic Fancy Background Shop at: PS | SSS | ”