The new Amaryllis Christmas Collection by Yana Smakula for Spellbinders offers a stunning range of dies, BetterPress plates, and a beautiful 3D embossing folder along with it’s coordinating stencils. This collection is perfect for creating elegant and festive cards. I crafted three unique cards using these products, featuring some of the products from this collection. Let’s take a closer look at each one!
Classic Red and Pink Amaryllis Card
Die-Cutting the Amaryllis Bouquet
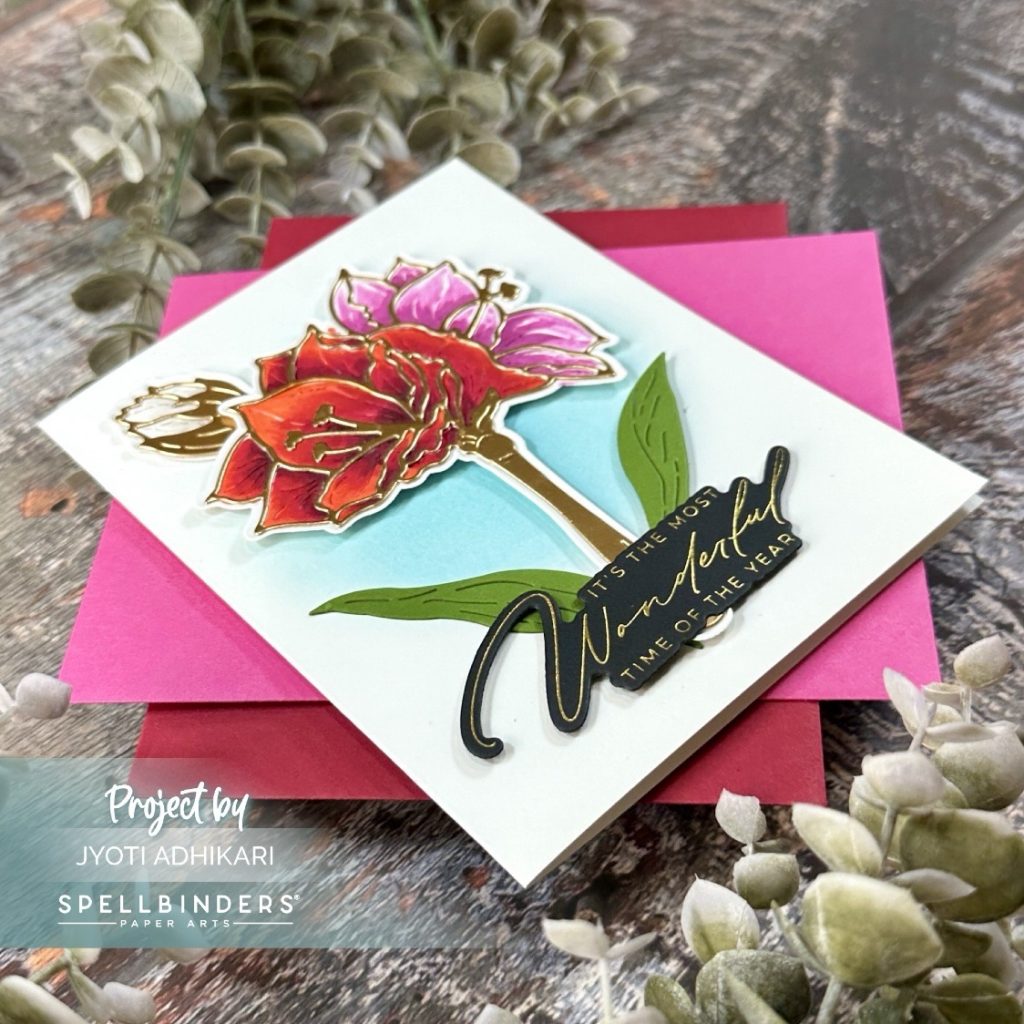
For my first card, I featured Yana’s Amaryllis Etched Dies and the Home for Christmas Sentiments Press Plate and Die Set. To start, I die-cut the flowers from white and mirror gold cardstock. The white formed the inside of the petals, while the gold created a stunning outline for the two amaryllis flowers in the bouquet. I used Copic markers to color the white petals, giving one flower a rich red color and the other a soft pink hue. A bud of a white amaryllis completes the bouquet.

Creating the Soft Background
I kept the background simple with a light blend of Tumbled Glass Distress Oxide ink, focusing on the center of the card and fading outwards. This created a soft, wintry backdrop for the flowers.

Adding the Foiled Sentiment
For the sentiment, I used “It’s the most wonderful time of the year” from the Home For Christmas Sentiments from this collection. Instead of the usual letterpress effect, I opted for a gold-foiled sentiment on black cardstock. I then die-cut the sentiment with it’s coordinating die to add a polished touch.

Assembling the Card
I finished the card by arranging the amaryllis bouquet in the center of the card front, placing the white bud above the bouquet, and adhering the foiled sentiment along the bottom to complete the design.

Green and Gold Amaryllis Card
Crafting the Amaryllis Flowers
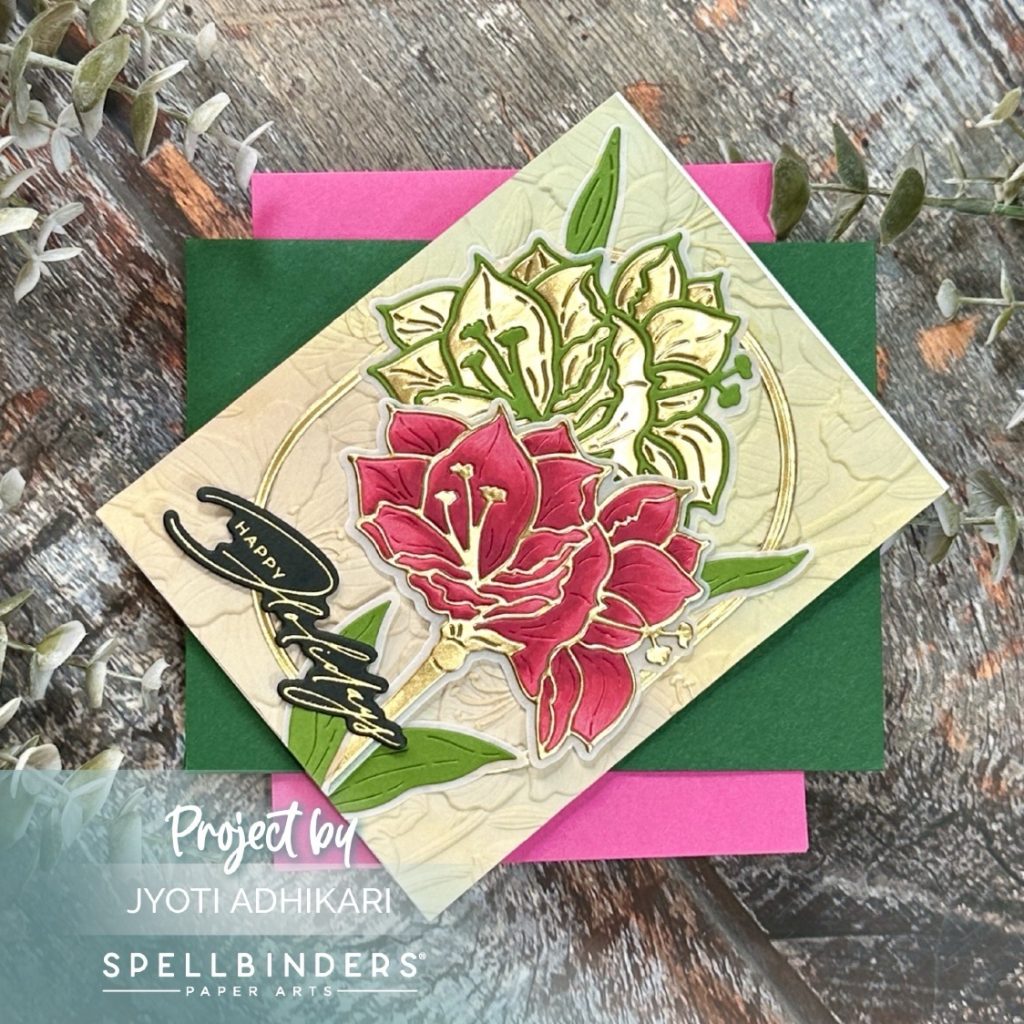
For this second card, I again used the Amaryllis Christmas Etched Dies, but with a twist in color. I die-cut the flowers from gold, green and white cardstock. One white flower petals were colored red like the previous card, but the second amaryllis had green petals with a gold outline for a unique contrast. This created a festive yet modern bouquet.

Inking and Embossing the Background
For the background, I blended Antique Linen Distress Oxide ink over a white panel and then embossed it using the Amaryllis Garden 3D Embossing Folder. The embossed pattern gave the background a subtle, elegant texture.

Foiling the Sentiment
For the sentiment, I selected “Happy Holidays” from the Home for Christmas Sentiments set. I foiled it with gold on black cardstock, adding a festive and bold element to the card.

Creating the Gold Oval Frame and Assembling
I die-cut an oval frame from gold cardstock using the Essential Stylish Oval Die Set to help highlight the bouquet. After attaching the embossed background to the card base, I placed the gold oval in the center, positioned the green flower to peek out from the top left of the red amaryllis, and adhered the sentiment along the bottom left.

Embossed Elegance in Red and White Amaryllis Card
Creating the Amaryllis Flowers
For my third card, I used the Yana’s Amaryllis Christmas Etched Dies again, opting for a bold red and white color scheme. The flowers were die-cut from red and white cardstock, and I used a darker red Copic marker to add dimension to the red petals. For the white amaryllis, I shaded the petals with a warm gray Copic marker to give depth. A red bud was also added to complete the floral arrangement.

Blending and Embossing the Background
The background for this card was created by blending Tumbled Glass Distress Oxide ink onto a panel. I then ran the panel through my die-cutting machine with the Amaryllis Garden 3D Embossing Folder on, adding a lovely embossed texture.

Foiling the Sentiment
For the sentiment, I chose “Merry Christmas” from the Home For Christmas Sentiments and foiled it in gold on white cardstock. I die-cut the sentiment and set it aside, ready for assembly.

Adding the Oval Frame and Final Assembly
I used the Essential Stylish Oval Die Set to create another gold oval frame, which I adhered to the embossed background. The red amaryllis took center stage, while I cut the white flower into two pieces—placing one on the top right of the bouquet and the other on the bottom left. The sentiment was added at the bottom to complete the card’s festive look.

These three cards highlight the beauty and versatility of Yana Smakula’s Amaryllis Christmas collection. Whether you prefer to use die cutting or embossing or using sentiments that use created with betterpress system or hot foil system, this collection offers everything you need for your holiday crafting. Which card will inspire your next project? Let me know in the comments!
Hugs,
Jyoti