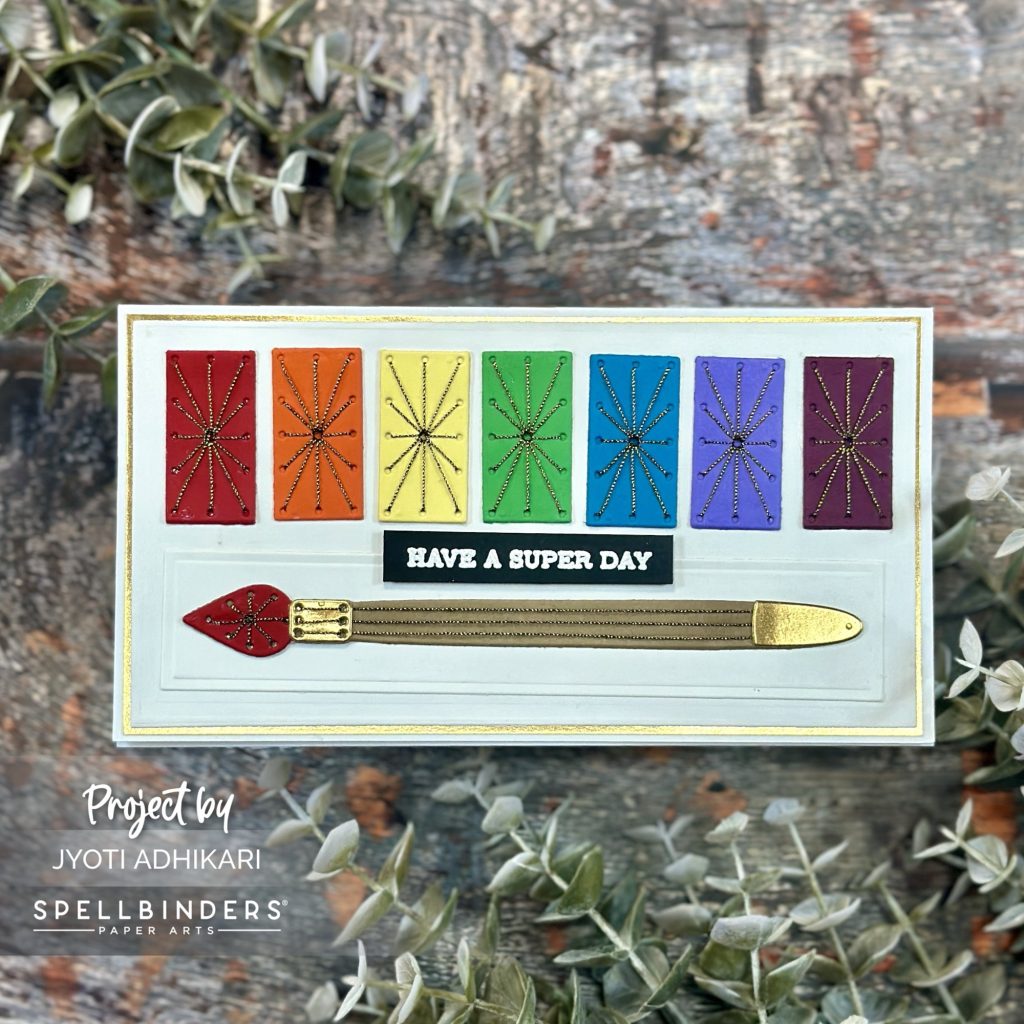
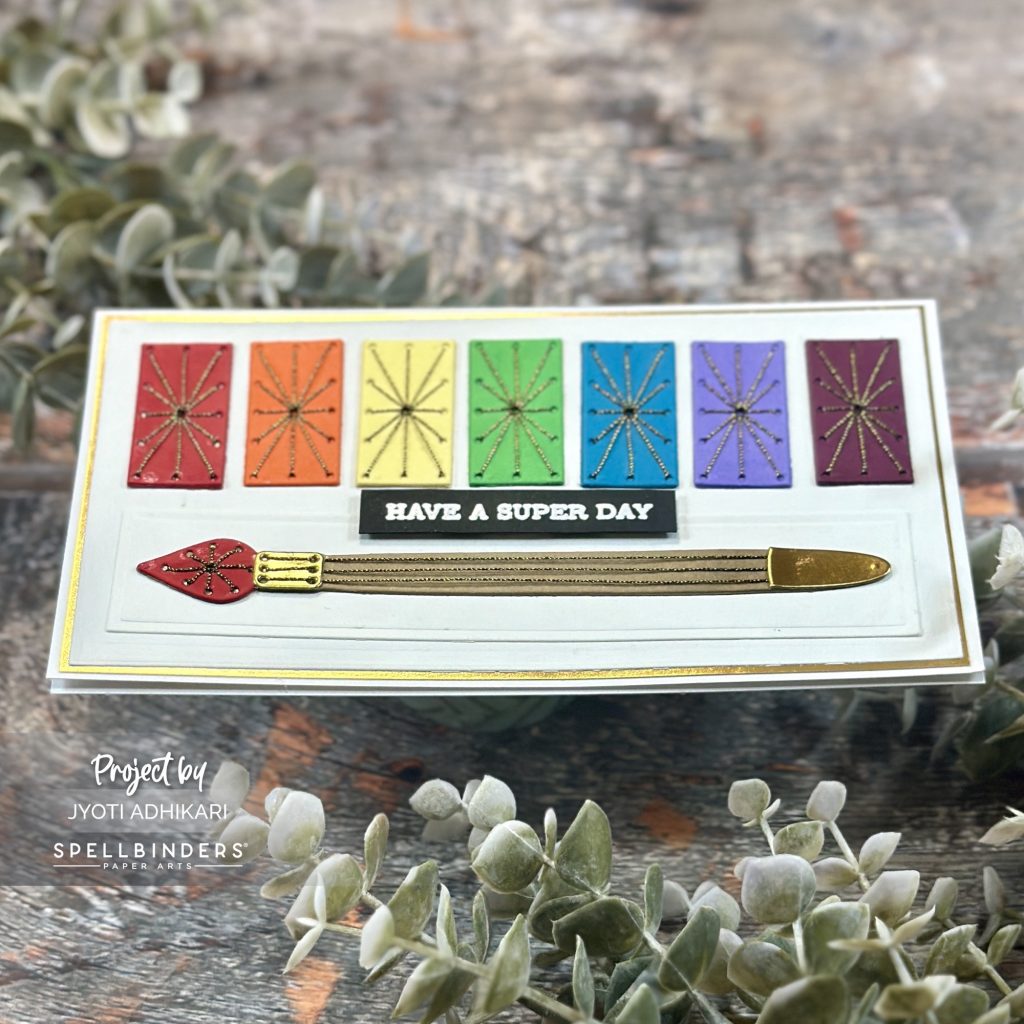
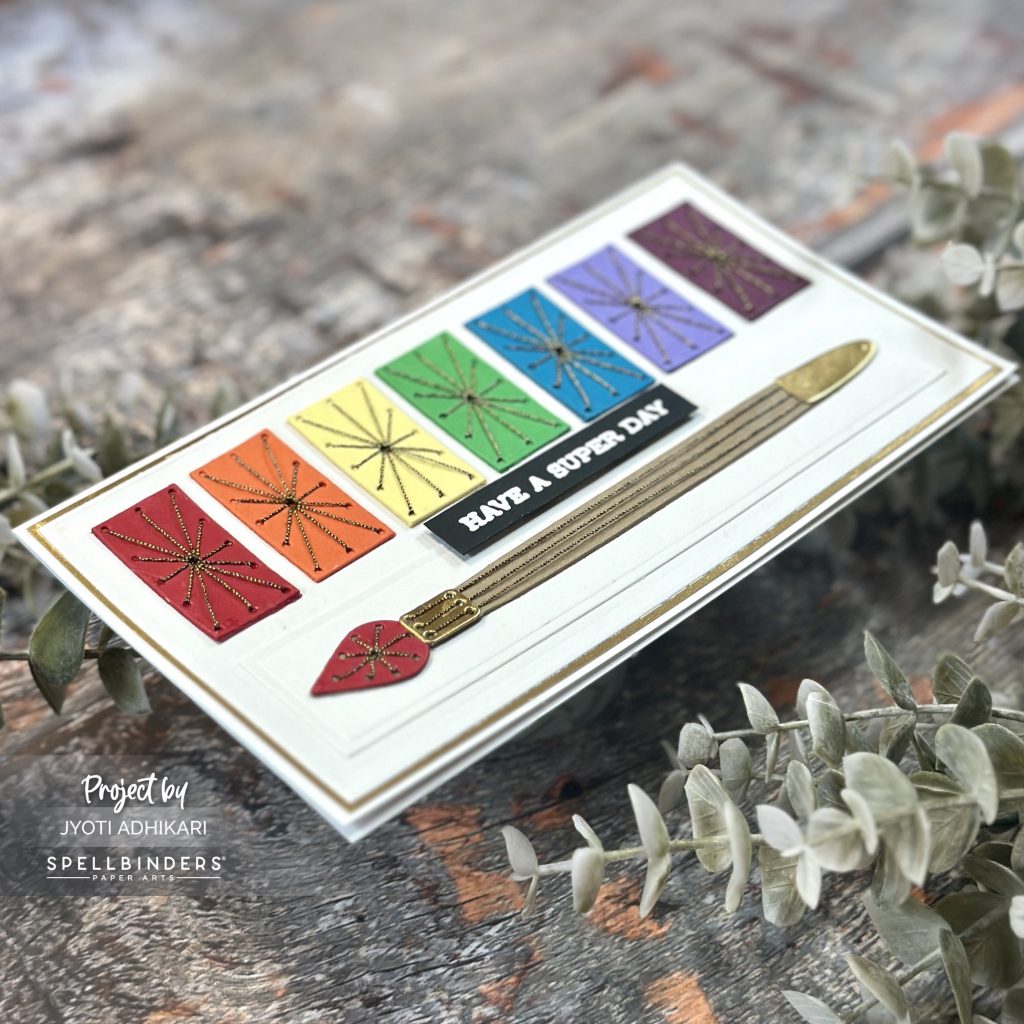
Creating a card that’s both vibrant and unique is always a joy, and today I’m thrilled to share my latest project featuring the Stitching Die of the Month for August 2024. This die set comes with a delightful watercolor pan and brush, perfectly sized for a mini slimline card. Let’s dive into the creative process of making this cheerful stitched rainbow paint pan card!
Selecting the Perfect Palette
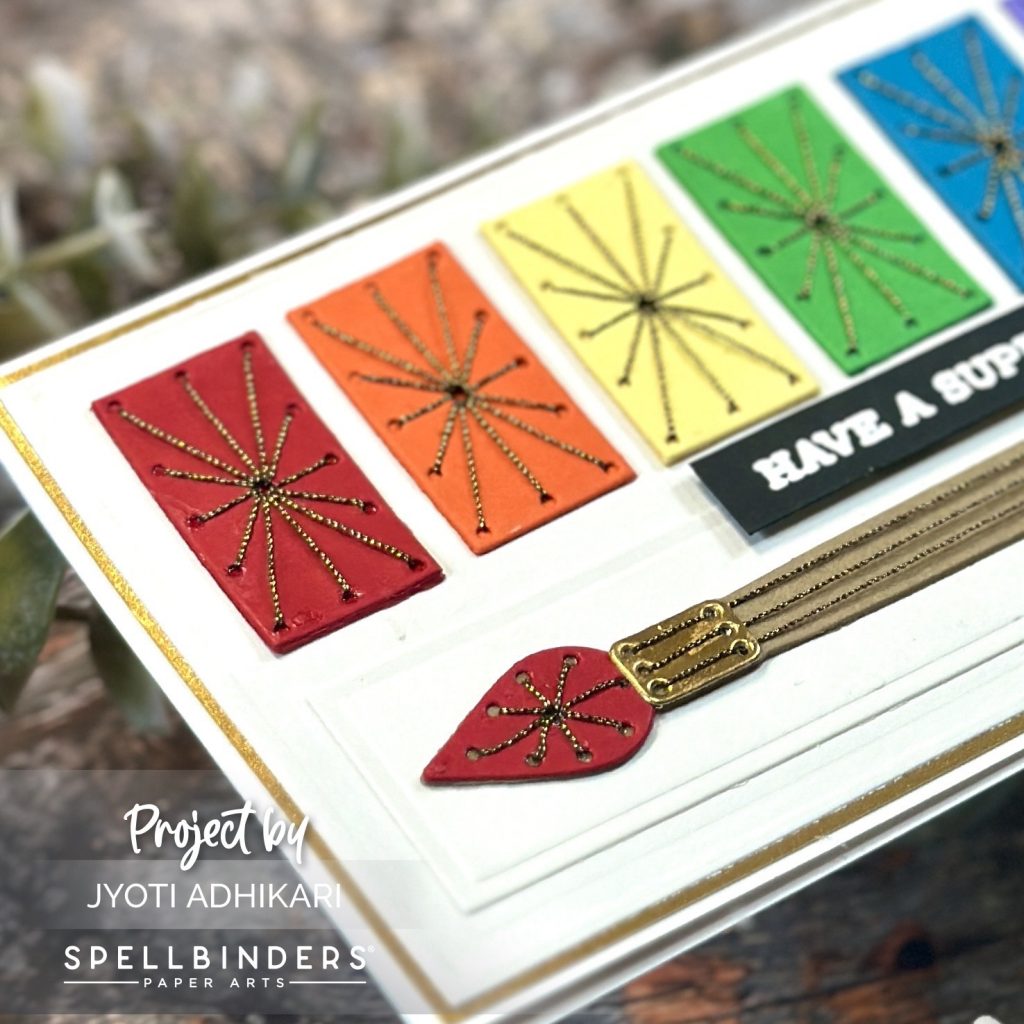
To start, I focused on choosing the colors that would bring this card to life. The die set includes various pieces, so I decided to pick up the rainbow colors for the paint pans. I chose white for the paint box, creating a clean and classic look, and brown with a hint of gold for the brush, adding a touch of elegance. With everything ready, I die cut all the pieces, eager to see how they would come together.
Adding Texture with Stitching
One of the highlights of this die set is the stitching feature, which adds a beautiful, handmade touch to the card. The die set has indentations, making it easy to see where the stitching should go. I carefully stitched all the pieces using black-gold thread, which gave the paint pans a sophisticated shimmer. Watching the rainbow colors come to life with each stitch was truly satisfying!
Assembling the Rainbow Paint Pan
With all the pieces stitched and ready, it was time to assemble the paint pan. I arranged the rainbow-colored pans in their spots and placed the brush in its designated place. The black-gold stitching tied everything together, creating a cohesive and stunning effect. This assembled paint pan was just the right size for a mini slimline card, measuring 3.5 by 6.5 inches, making it perfect for my project.

Creating the Card Base
Next, I focused on creating the card base. I opted for a simple white base to let the vibrant paint pan be the star of the show. After cutting the card base to the right dimensions, I adhered the stitched paint pan to the front using glue, ensuring it was securely in place.
Adding the Sentiment
No card is complete without a thoughtful sentiment! For this project, I wanted something uplifting, so I chose an old favorite from my stash: “Have a super day.” I stamped the sentiment on a black cardstock strip, using clear embossing ink and then heat embossing it with white powder for a bold contrast. I placed the sentiment strip in the center of the card, just beneath the colorful pans, adding the perfect finishing touch.
And just like that, my stitched rainbow paint pan mini slimline card was complete! This project was a delightful mix of stitching, color, and creativity, and I hope it inspires you to try something similar. I’d love to see what you come up with, so please share your creations with me on social media. Happy crafting!
