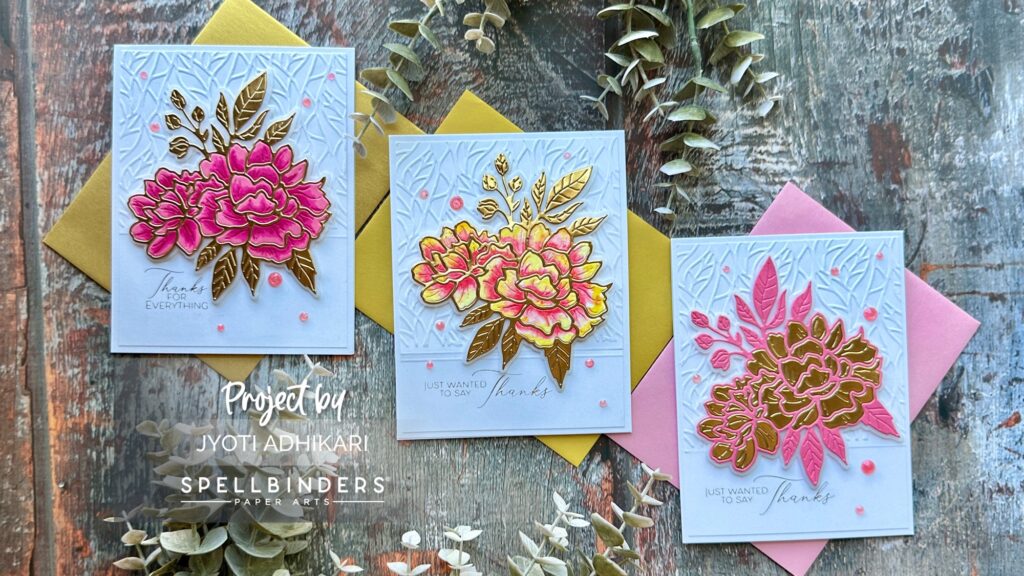
Crafting with dies offers a delightful way to enhance cardmaking projects, especially when using versatile products like the Peony Celebration Etched Dies by Yana Smakula from Spellbinders. In this blog post, I will share how I created three cards using this die set.
Card 1: Elegant Shading with Copic Markers
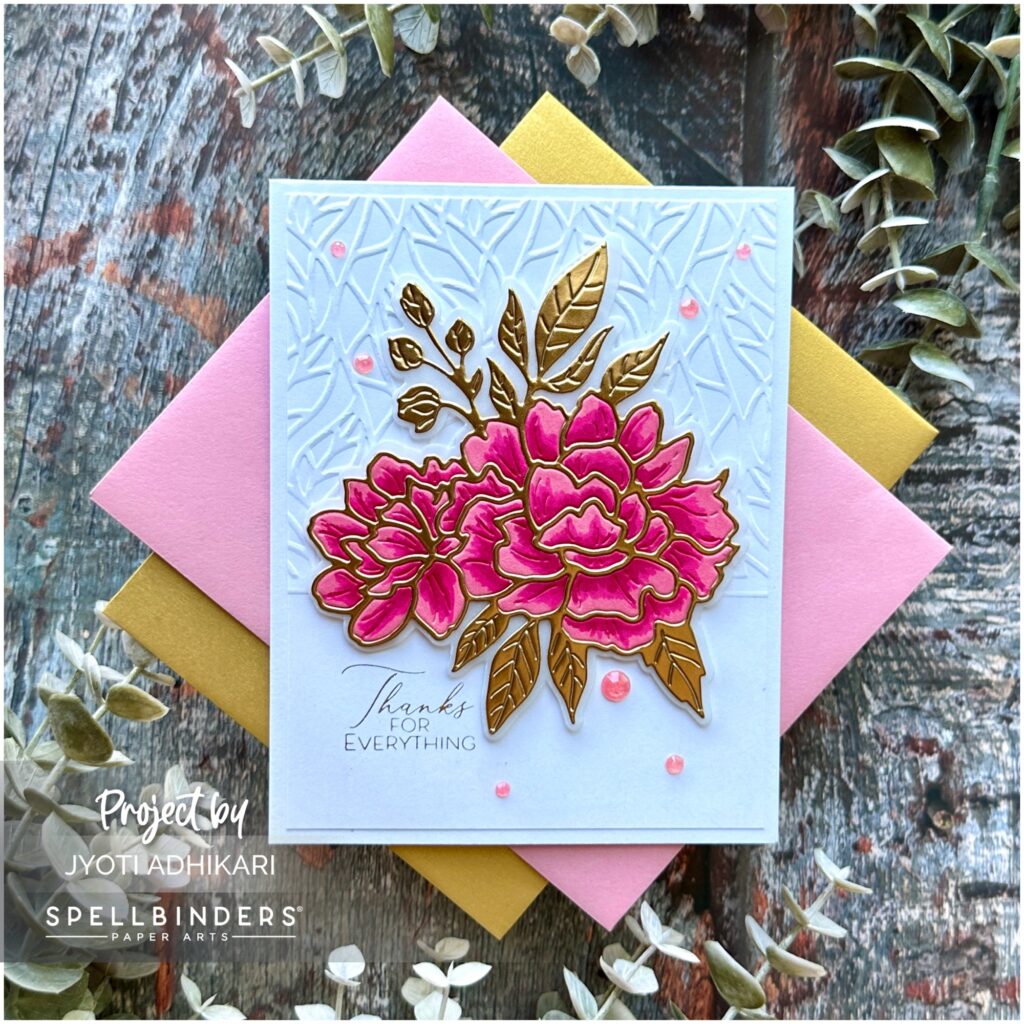
For the first card, I focused on adding depth and dimension to the petals using Copic markers. I began by die-cutting the peony flower twice—once with gold cardstock and once with light pink cardstock. This approach allows for a stunning contrast between the shaded pink petals and the gold outline.
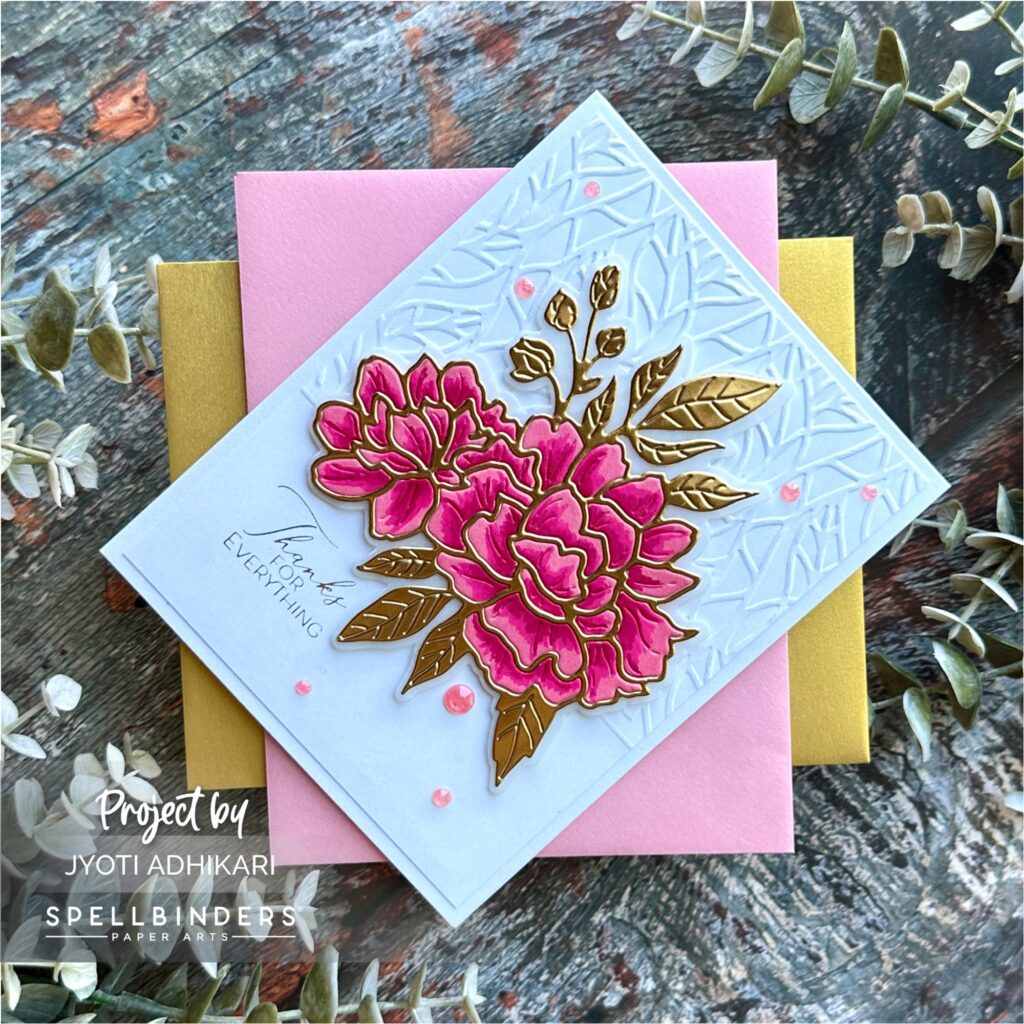
To add shading, I chose a darker shade of pink Copic marker. Starting with a light pink cardstock makes the process simpler, as I only needed to add shadows. After die-cutting the petals from the pink cardstock, I used Glad Press’n Seal to pick up all the pieces at once. This handy technique allowed me to apply glue to the inner petal pieces easily and adhere them to a vellum shadow layer.
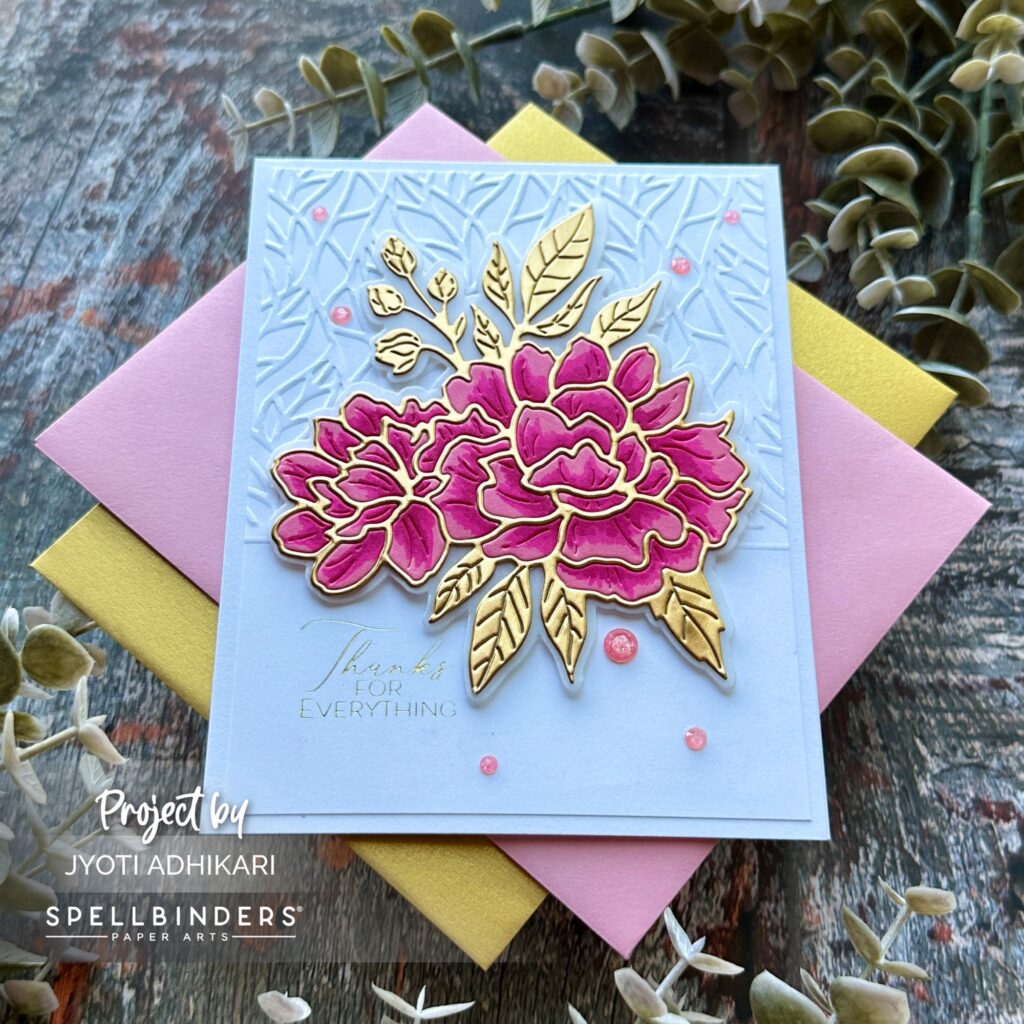
With the petals secured on the vellum, I shaded the areas with the Copic marker to achieve the desired depth. Once completed, I added the gold outline piece, perfectly framing the colored petals.

For the background, I partially embossed a white cardstock panel using a leaf embossing folder, leaving an area for foiled sentiments. I foiled the sentiment “Thanks for Everything” from the Always You Timeless Sentiments Collection. To create a clean and finished look, I used a bone folder and score board to create a score line separating the embossed and foiled areas. Finally, I embellished the card with pink jewels to add a touch of sparkle.
Card 2: Utilizing Leftover Pieces for a Coordinated Look
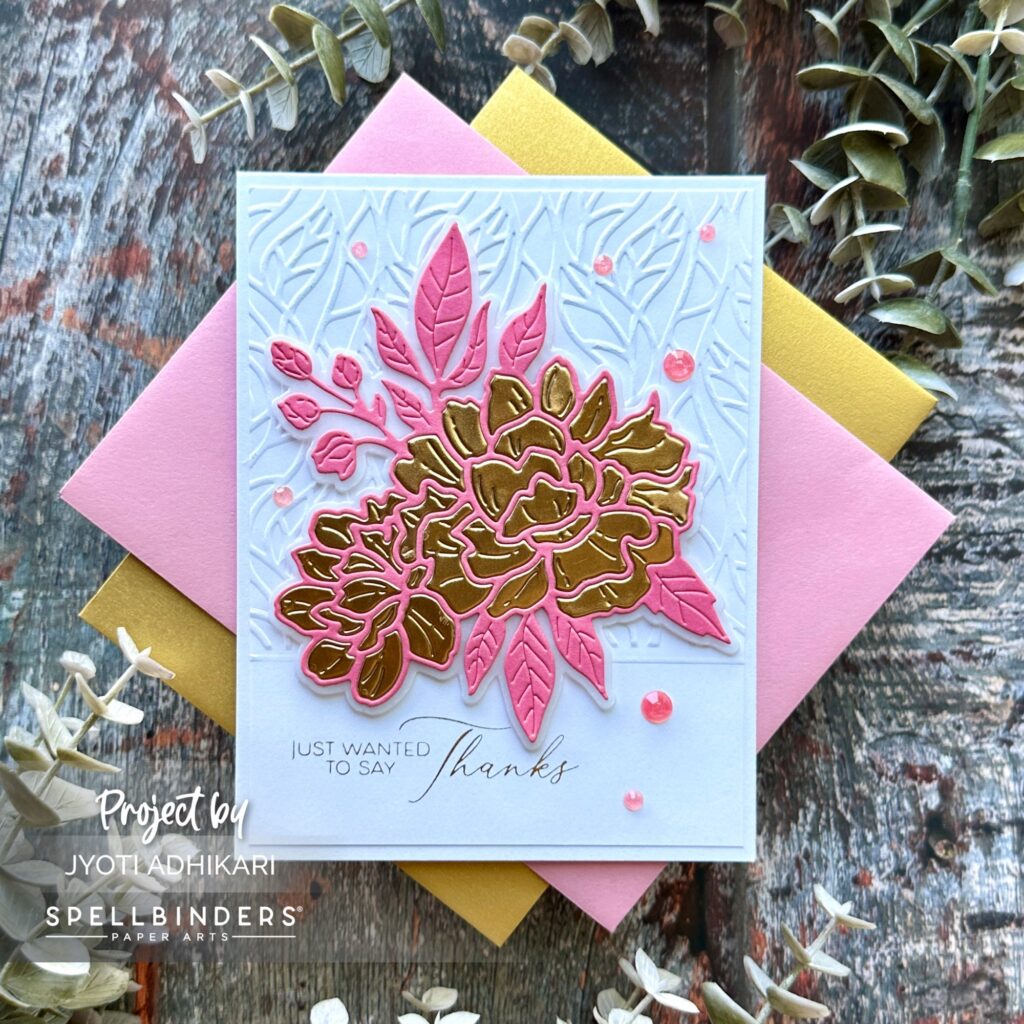
The second card showcases how to make the most out of leftover pieces from the first project. I used the leftover gold petals and adhered them to another vellum shadow layer. Then, I took the leftover pink outline from the pink die cut to complete the flower.
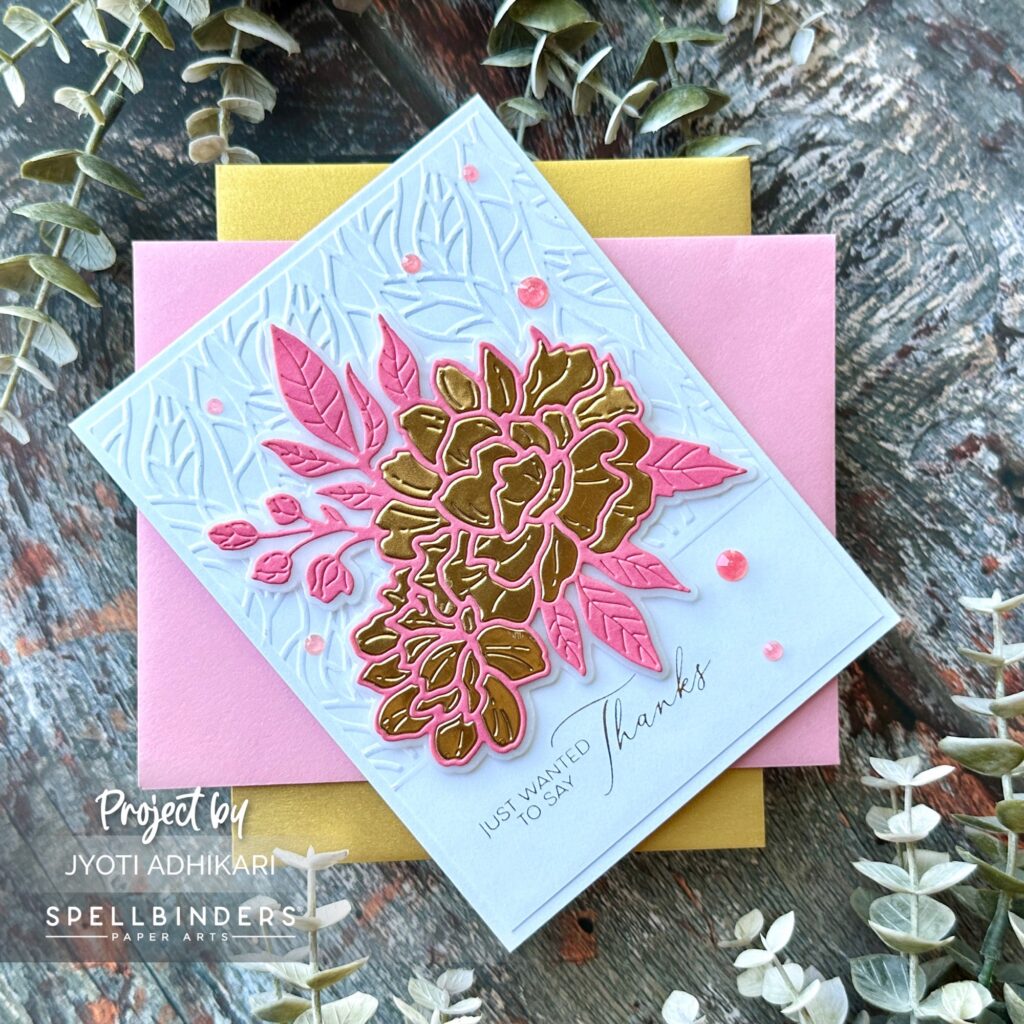
This card features the sentiment “Just Wanted to Say Thanks” from the New Beginnings Timeless Sentiments Collection. Similar to the first card, I added partial embossing and a score line to the background for a cohesive and polished appearance. To finish, I embellished the card with the same pink jewels, tying it together with the first design.
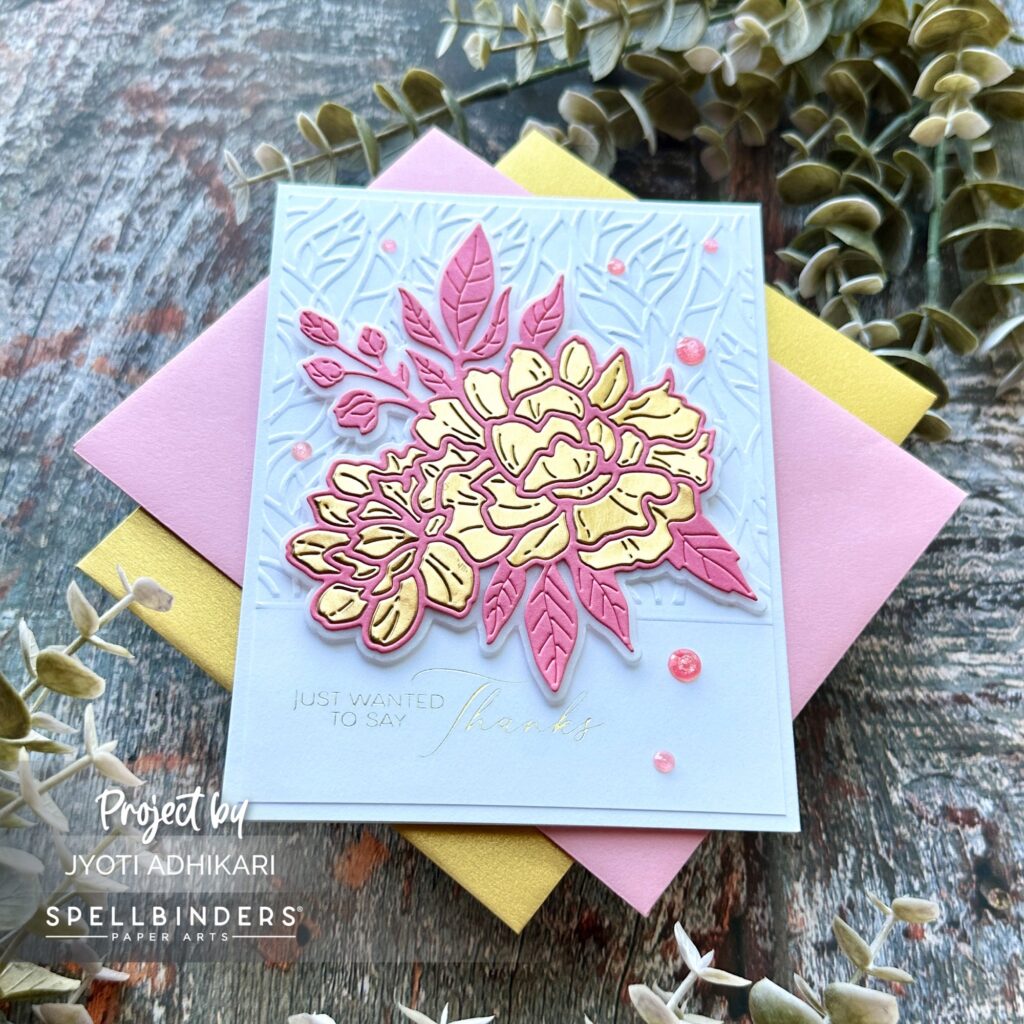
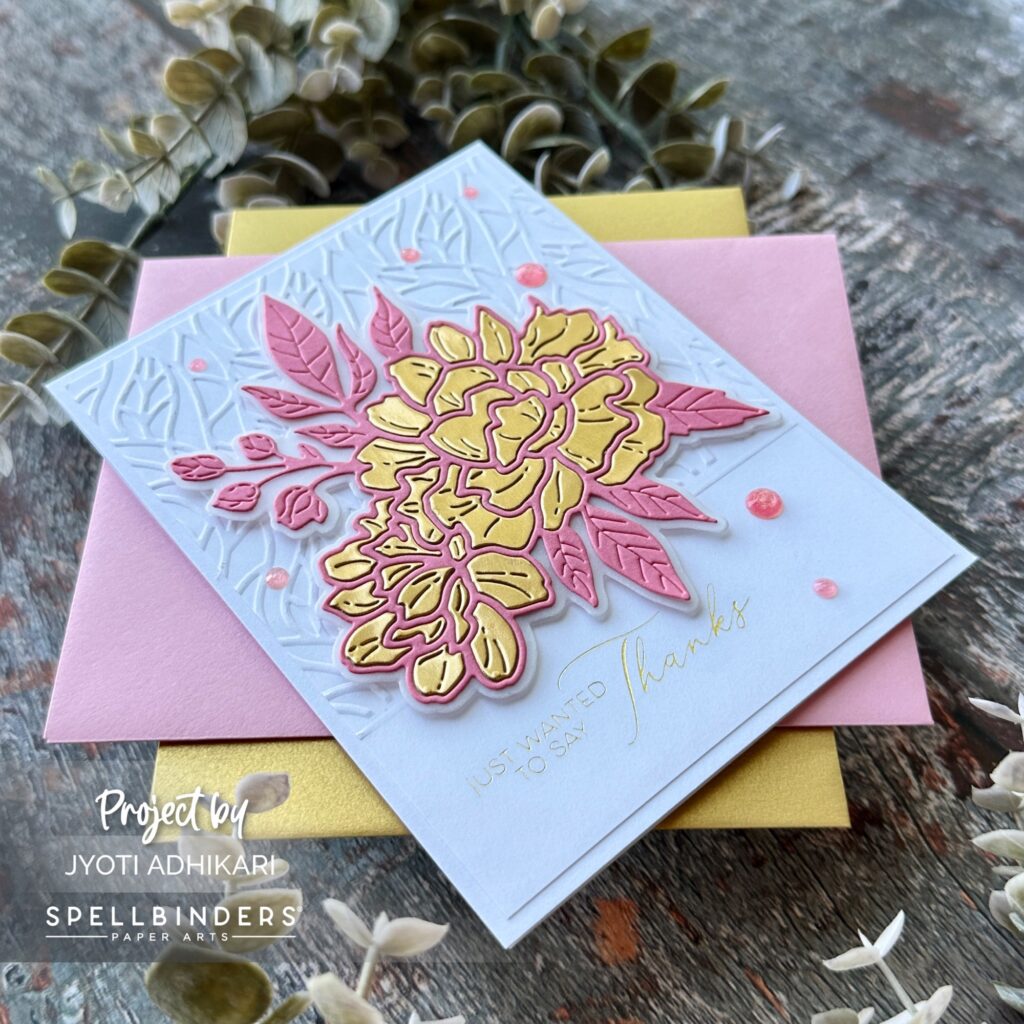
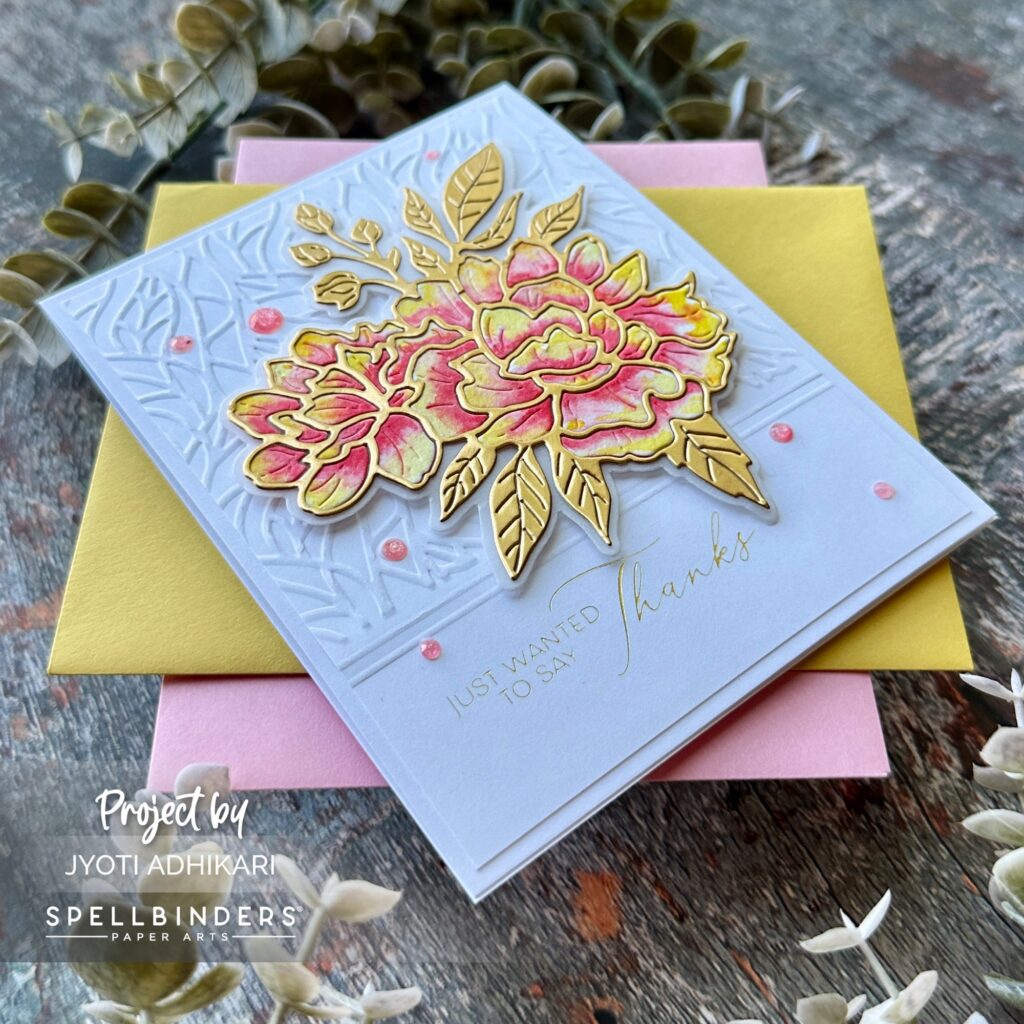
Card 3: Watercolor Wonder
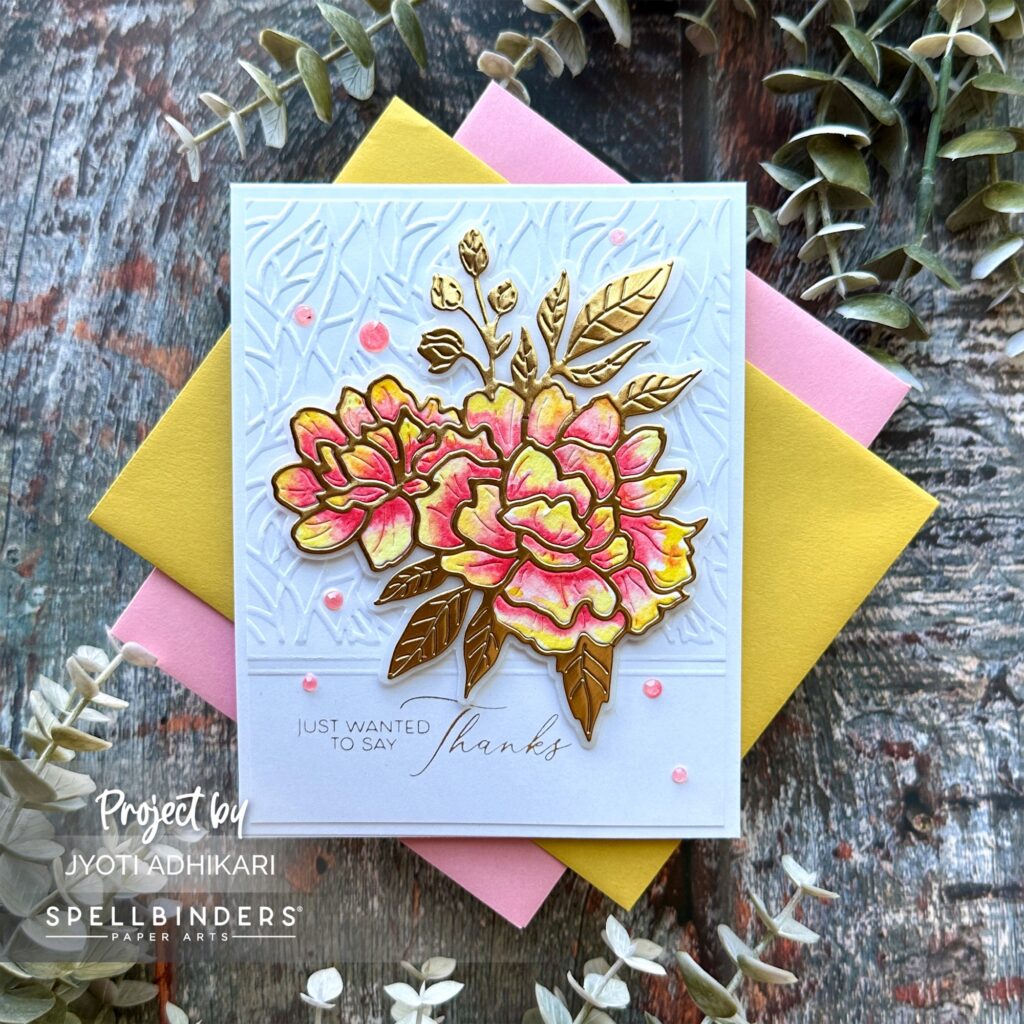
For the third card, I wanted to explore the beauty of watercolor. I die-cut the peony flower twice—once with watercolor paper and once with gold cardstock. I used the inside of the petals from the watercolor paper and the gold outline for this card.
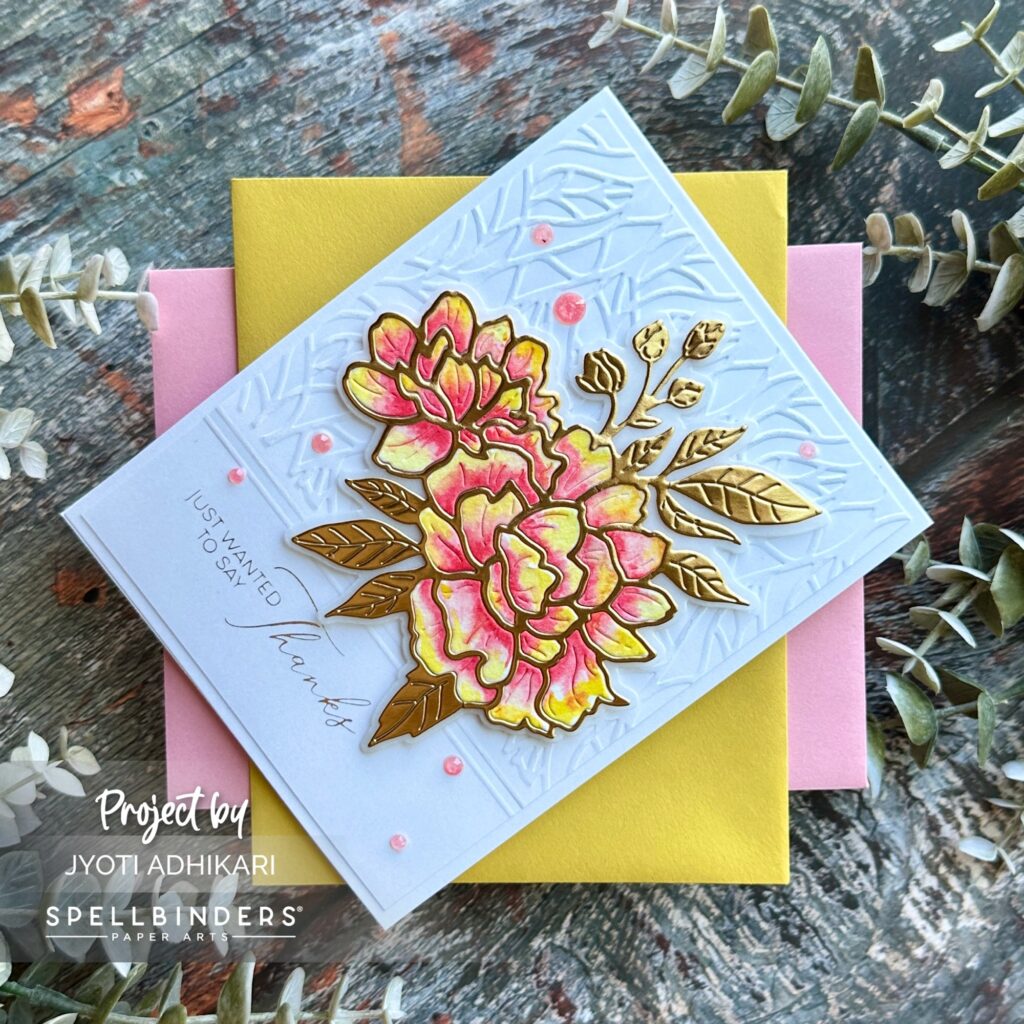
After picking up the inside petal pieces with Glad Press’n Seal and adhering them to a vellum shadow layer, I used Karin markers in pink and yellow shades to watercolor the petals. The combination of these colors added a vibrant and dynamic look to the flower. Once the watercolored petals were completely dry, I added the gold outline, which provided an elegant and striking contrast.

This card also features the sentiment “Just Wanted to Say Thanks” and is embellished with pink jewels, maintaining consistency across all three designs.
By using the Peony Celebration Etched Dies in three different ways, I was able to create a set of unique and beautiful cards. Each technique—Copic marker shading, utilizing leftover pieces, and watercoloring—demonstrates the versatility of this die set. Whether you’re a beginner or an experienced cardmaker, these methods offer a variety of ways to get more value from your dies and expand your creative possibilities.
Hugs,

 Peony Celebration Die Shop at: SB |